Tuesday, August 31, 2010

Miramar by the Sea, Part I

This is yet another report on one of the structures built at the Ventura County Fair this year.

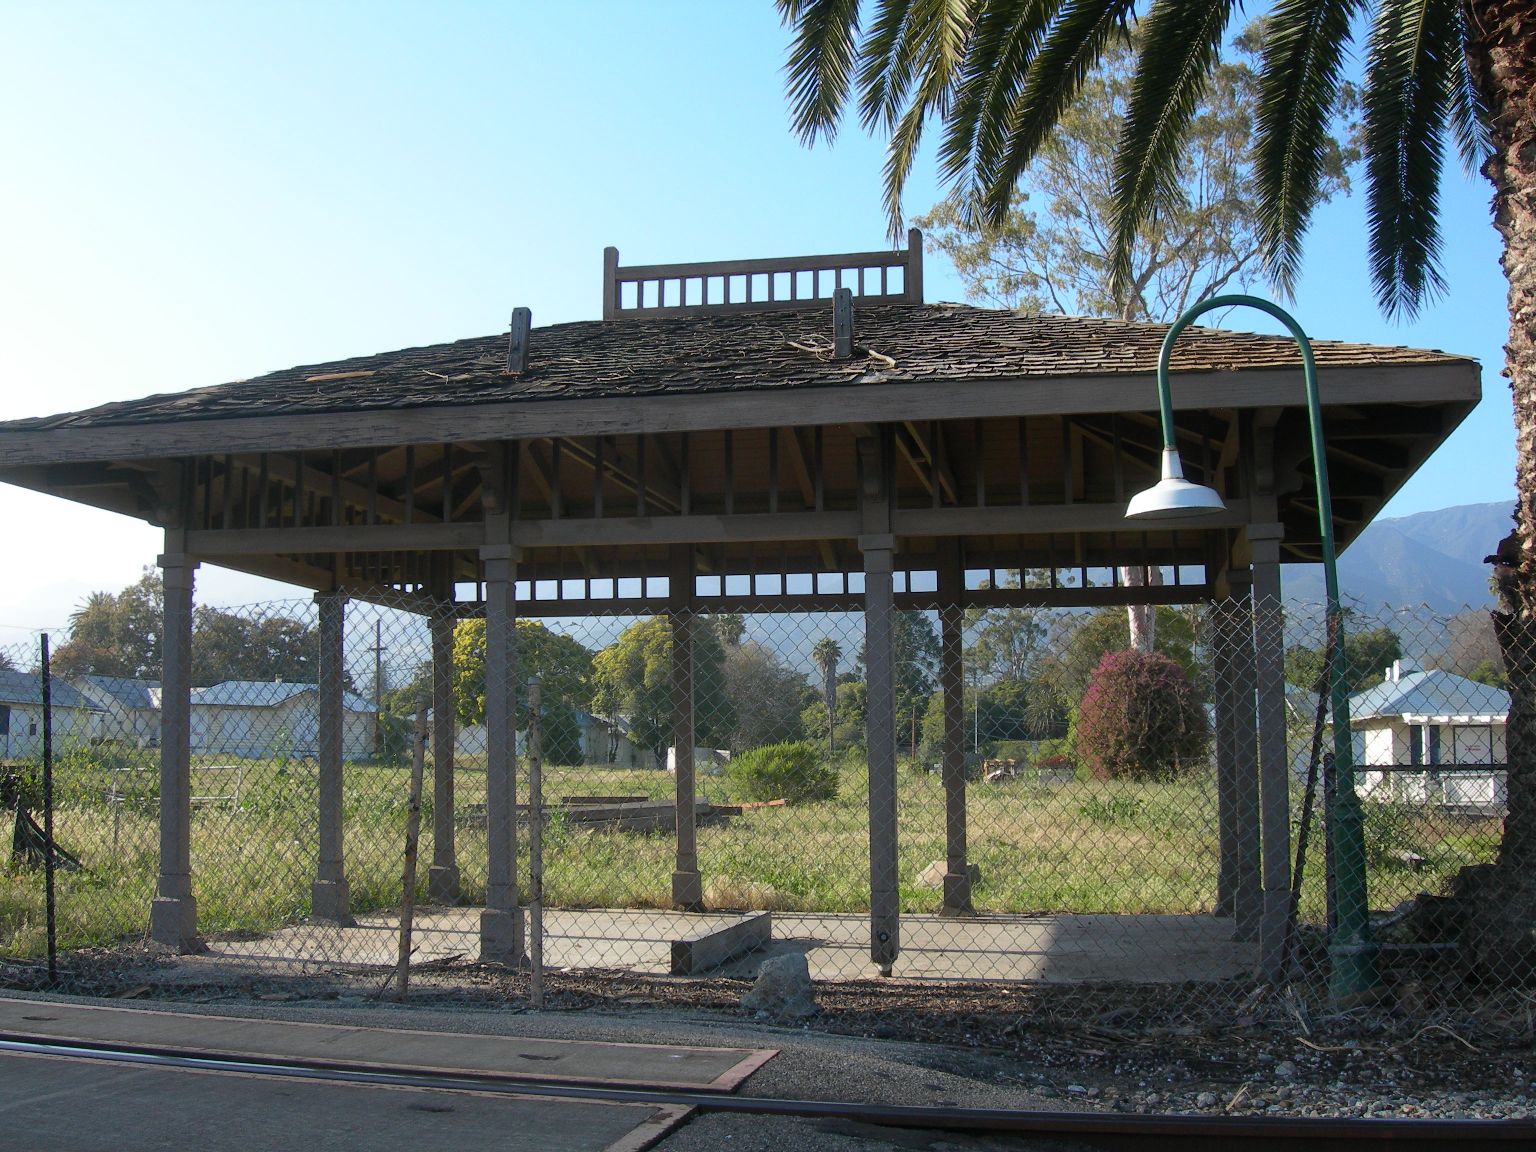
The Miramar Hotel is really an off-line set of structures, but there was, for quite a while, a close tie with the railroad. The Hotel began in 1889 when Josiah and Emmeline Doulton built a cottage for visitors to their Ocean View Farm, a 20 acre ocean front property in Montecito, CA. A guest suggested they call the place Miramar which is Spanish for Ocean View. Mrs Doulton liked the name and it stuck. By 1892, the Southern Pacific Railroad which had only arrived along the Coast 5 years previously, erected a passenger shelter on the property. The fare from the Miramar to Santa Barbara was 10 cents! A reconstuction of that passenger shelter still stands at the hotel site.


Additional structures were built on the property. During this period, nearby Las Fuentes Ranch owned by the Crocker-Sperry group, sold lemons under the Miramar label among other labels bearing local locations including Summerland and Montecito. Here is a print of the Miramar label.


The property struggled during the depression and was eventually sold to Paul Gawzner on Nobember 3, 1939. Mr Gawzner added an additional 150 rooms in hotel-style buildings and cottages. He also added an auditorium and brought in two railroad cars. One was a Santa Fe lunch counter dining car which was converted to a snack bar right along the tracks. The second was a Union Pacific car, National Embassy.

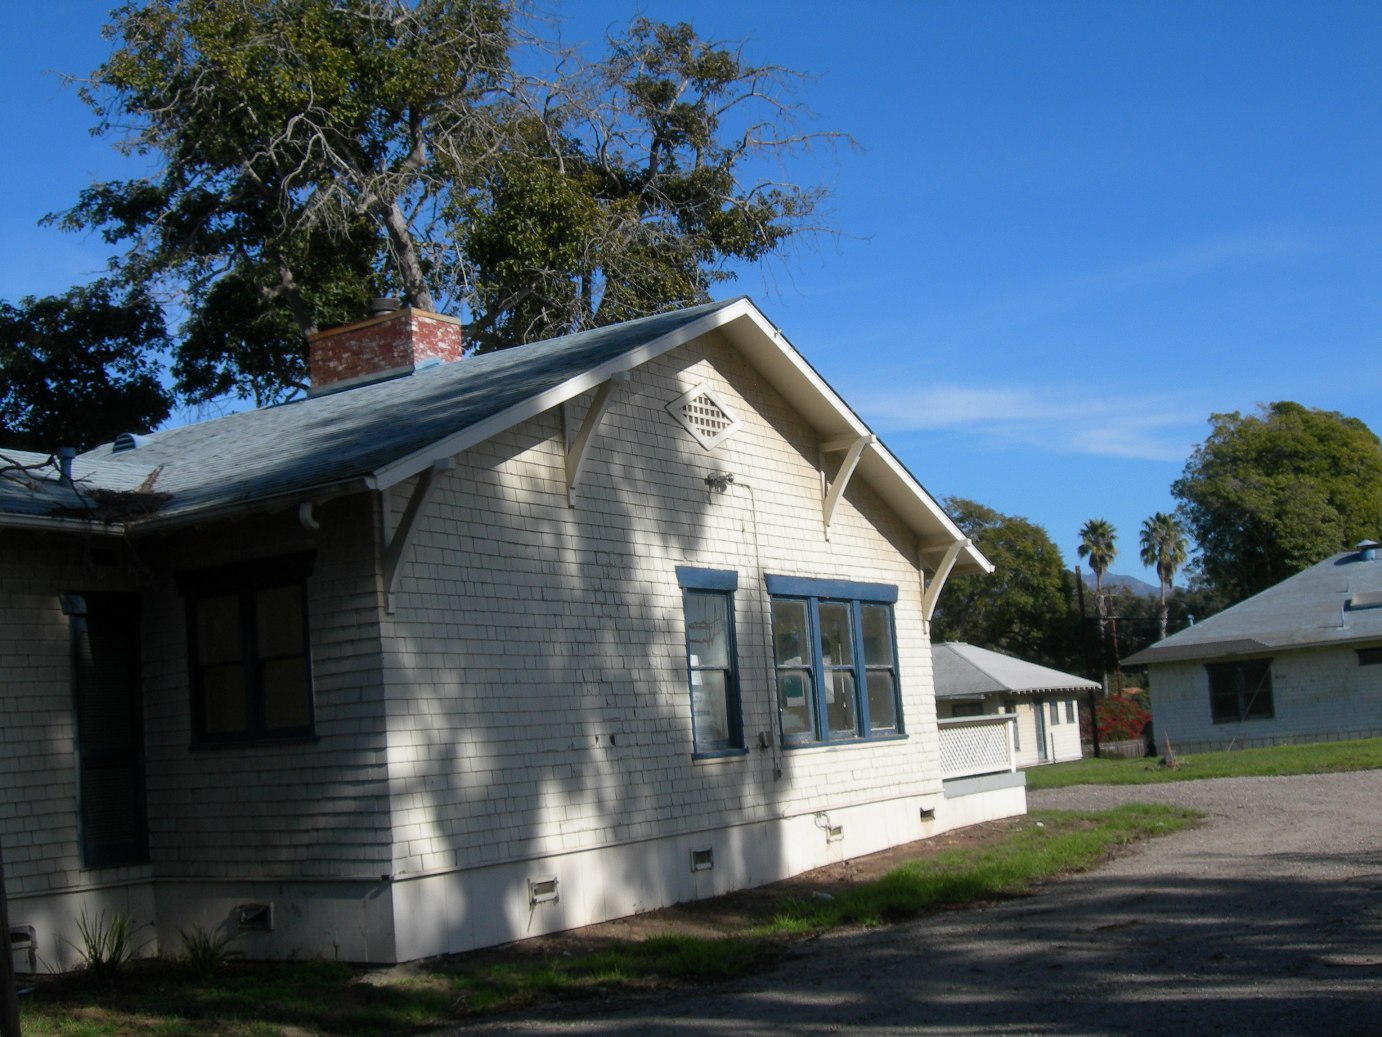
It became a family destination with a beautiful beach and reasonable rates until 1998 when Gawzner sold it to Ian Schrager. Schrager closed the hotel in 2000 for restoration/redevelopment and then went bankrupt. The property was sold to Ty Warner in 2005 and then to Rick Caruso in 2007. Development plans have been approved but thus far no progress has been made. Here are some photos of some of the deteriorating cottages.


.
.
.
.
.
.
.
.
.
I have a space in a turnback loop that needs filling and so I hope to put in some cottages, the passenger shelter, the two rail cars, along with tennis courts and gardens to be reminiscent of the Miramar in the latter part of the twentieth century. It will not be a scale replica.

I looked for some small simple structures that might be good stand ins for the cottages at the Miramar. The best I came up with were the Maxwell Avenue Cottage from Rix Products. Here is a Rix photo of the completed kit.


Here is a poor photo of a very simple cottage at the Miramar.


.
The problem with the kit is that it has brick foundations and brick porch walls and supports. There were no brick structures at the Miramar. Also the roof and the window and door trim needed to be painted that Miramar Blue color. So I modified the Rix kit but only slightly. I used some Squadron putty to smooth/eliminate the brick foundation. I painted the door and window trim blue. I painted the roof blue.

There were no brick porches at the Miramar so I fabricated a porch from styrene. The photo I have of a porch shows lattice around the edge.


.
.
I tried to figure out what to use for the lattice. I decided to wander around the fair to look for lattice to measure and then figure out how to proceed. I walked around for about 15 minutes and found some at the Agriculture Building. When I returned to Bob's booth, I started laughing because right next to us was a wall of lattice. Sometimes I am not very observant! At the other end of the building we were in, the Gold Coast Modular Railroad Club (http://www.gcmrc.com/) had a layout operating. One of the operators, Darrell Prestridge, had come by several times. He came by as I was trying to figure out what to use for lattice and thought he might have something. He went back to the layout and rummaged through several boxes and came up with some netting. He squished it to "flatten" the lattice. I painted it white and cut it to fit the porch. It worked out well - Thank You Darrell. Here is the semi-finished model in a photoshopped photo.


.
.
.
.
.
.
.
.
.
.
.
Here are several of the "Cottages" temporarily sitting in location where the Miramar will be on the railroad.

.
.
.
.
.
.
.
.
.
.
.
.
.
You might notice that the sign is sitting on some larger track. Yes, I was bitten by the G-gauge bug, but I am refraining from building a layout but merely assisting others in exchange of running some of my meager equipment on their layouts. I did break down and lay some larger scale track in the front yard, but only about 6 to 10 inches. The scale is 12" to the foot. I think it is 133 pound rail.


.
.
.
.
.
.
.
.
.
.
There is still much to be done including tennis courts, maybe the 2 story motel type structure, the passenger shelter, the gardens, and, of course, the two railroad cars.

When they started demolishing the hotel, the two cars were moved. The Santa Fe Lunch Counter car was moved to Bakersfield where it now operates as Burger Depot at 6801 White Lane. The Pullman car, National Embassy was moved to the Fillmore and Western Railroad in Fillmore, CA and is owned by the Santa Clara River Valley Railroad Historical Society. You can read about it at their website http://www.scrvrhs.com/. Look under their equipment.

I will post again on the Miramar when I make more progress.

Monday, August 23, 2010

Carpinteria's Standard Oil Facility

This is a report on another of the structures I built at the Ventura County Fair this year.

One of the premises of my layout is to include many of the industries along the right of way that were serviced by the Southern Pacific. This includes industries that were long gone by the 1994 era that I am currently modeling and even the 1964 era that I hope to migrate to some day. The Standard Oil of California facility in Carpinteria is one such example.

I enjoy doing historical research. One place I look along the route is at Sanborn maps. Sanborn was an insurance underwriter and developed the maps to document structures and fire fighting equipment in order to establish levels of risk for the various buildings to be insured. They did not insure railroad tracks, so they are not great for exact locations, but it does give some idea. Here are two of the Sanborn maps for Carpinteria dated December 1929, showing the depot, water tanks, and section house on one and the Standard Oil facility, two lemon packing houses, a walnut packing house and the SP Milling facility on the other.


.
.
.
.
.
.
.
.
.
.
.
.
.
.
.
.
.
I am a member of the Carpinteria Valley Historical Society (http://www.carpinteriahistoricalmuseum.org/ ) so I contacted the museum curator to see if he knew of any photos of the Standard Oil facility. I got an interesting response: "Bruce. I did not even know about the Standard Oil facility until you showed me the Sanborn map!" We talked a bit more and have an informal future date to look at some photos of nearby structures to see if it happens to be in the background. There is a 1920's era aerial photo that I looked at and upon some extreme close up I think I can see the facility and possibly a rail car on the spur. Here is the photo with the depot (SP Standard 17, constructed in 1887) to the left. Just below it to the right are the two water tanks and the section house. On the right side of the photo is the Standard Oil facility including a warehouse building and to the right a vertical storage tank. The railroad tracks run diagonally from the lower left to the upper right of the photo.


While I currently do not have a better photo of the Carpinteria facility, I have seen several other buildings that were at one time Standard Oil wholesale fuel distributors including one in Santa Barbara which I may also model later. They were constructed using corrugated steel sheathing. The Grandt Line (http://www.grandtline.com/) Raised Platform Warehouse kit #5908 is ideal for the structure.


.
.
Grandt Line also has a companion kit ( Midwest Petroleum Distributors kit #5907) that has a vertical storage tank.


.
.
The warehouse building is 4 3/4" by 6 1/4". Unfortunately, the space I have on my layout is only 3" between the track and the fascia. So I cut the kit up and shortened it to the 3". It was an easy kitbash. When it came time to paint it I decided to try a technique I had read about using rubber cement to simulate peeling paint. So I painted some rubber cement on a few of the walls, then painted the walls with white acrylic paint from the craft store. After the paint dried, I used a pencil eraser and rubbed where I had applied the rubber cement. The paint peeled right off and it looks good.

For the roof, I went to Bing Maps and using their Birds Eye view, looked at the Union Oil Co. facility in Santa Barbara at Salsipuedes and Guitierrez streets. It is also a similar corrugated building with a porch like the Grandt Line kit. Here is a photo from the southeast showing where the track went in blue. Also notice the porch and the vertical storage tanks to the right.


.

Here is a photo of the front of the finished kitbashed model.


.
.
.
.
.
.
.
.
.
.
.
Here are two Photoshoped photos of the sturcture place on the layout.


.
.
.
.
.
.
.
.
.
.
.
.
.
.
.
.
.
.
.
As you might notice the clearance is very tight and the structure extends past the fascia. I will be adding 1/2" to the layout to accomodate and bulge the fascia out slightly so as to maintain a smooth surfact along the aisle. I will probably add a piece of plexiglass at this point to protect the two or three structures that are near the edge.
.
Stay tuned for the next Ventura County Fair installment on the Miramar Hotel.

Sunday, August 22, 2010

Unusual Visitors along the SP Santa Barbara Subdivision Tracks

Thought I would stray a little and have some fun with a couple of visitors along the Southern Pacific's Santa Barbara Subdivision.

In July my daughter and son-in-law took a trip to Japan and left us in charge of their two adorable cats. My son is allergic to cats so we have not had any cats in the house. He now lives in Portland, OR , so we gladly took the cats for the three week Japan trip. The cats were very shy at first but loved exploring everywhere they were allowed and a bit more. We kept them out of the one bedroom my son uses, and I kept them out of the train room until the last week.

They are indoor cats and were not suppose to be outside but through a sequence of errors, we managed to leave the front door open while we were gone for 4 hours and both cats escaped. We were worried sick and looked all around the neighborhood as it got dark. We found one but not the other.

For the next two days we walked the neighborhood several times a day, enlisting all the neghbors we met to help look for the small black male cat. We live in an area where coyotes are common and routinely feast on cats so we were very concerned. The cats had only been at our house for a week so I had visions of the cat trying to go home. At the end of the second full day (48 hours) we walked the neighborhood, calling the cat and shaking a container with dried cat food in it. No sign of the cat so after 8 blocks I headed for home while Andrea (my wife) tried one more short cul-de-sac. She returned home about ten minutes later with no luck. As she turned around to turn on the porch light, the black male ran inside. He was dirty and smelly, and very hungry but he was back!

It was too much of an adventure and stressed us out but it was still fun having them around. Here is a photo of the two cats looking out the screen door at some of the many birds in our back yard.


.
.
.
.
.
.
The female had the most fun in the train room. Here is a photo of her walking the tracks just west of Goleta on the first level.


.
.
.

About this same time I saw a deal on Factory Direct Trains' Inspection Car. It is powered and DCC equiped. I added an orange SP logo to each door and may add orange stripes later. It definitely needs some weathering. I took it over to Jon Cure's Inyo Subdivision [Here are some nice photos of Jon's layout http://www.pbase.com/rbarnes11/jcure ] this last Saturday and ran it from Mina to Cantil. It worked well. Here is a shot crossing a bridge just south of Owenyo and just north of Linnie.


.
.
.
I have run it a couple of times on the Santa Barbara Subdivision but only in short stretches. Here is a photo passing the Giant Lemon stand.

Friday, August 20, 2010

Ventura County Fair and the Cantilever Signal Bridge

My friend Bob Lyon was asked to build some model railroad structures for a large model railroad some time back. He really enjoyed building the models and weathering them. Since he was out of work at the time he decided to start his own business building, customizing and weathering scale models. He calls his business the Elmira Branch Manufacturing Co. - named after the Pennsylvania Railroad Branch line that operated from Williamsport, PA to Canandaigua, NY (with it's well known branch to Sodus Point's massive coal dock). The branch ran through Elmira, NY where Bob grew up.

This year Bob exhibited at the Ventura County Fair from August 4 to August 15. He needed some help so he could take a break occassionally for food and other necessities. I volunteered to help out, and spent 5 days at the fair. I decided I could join Bob and build some of the structures that I need for the layout that otherwise would continue to languish in their boxes. Here is a photo of Bob and I sitting at the Elmira Branch Manufacturing Co. booth at the fair.


.
.
.
.
.
.
.
.
.
I ended up working on four projects. A cantilever signal bridge, a Standard Oil wholesale fuel distributor, the Miramar hotel and a US&S H-2 searchlight signal. I will devote a separate post to each of the structures. This one is for the cantilever signal bridge.

I knew I wanted a cantilever signal bridge as the Southern Pacific had one at the east end of Santa Barbara. It was almost a signature structure. I rummaged through my photos and found one I took of a weed spraying train looking east from Milpas and the tracks.
.


.
.
.
.
.
.
BLMA has a kit for a cantilver signal bridge and when I saw it I knew it was right for the location. I have had the kit sitting with the photo at the location on the layout for a long time.
The kit is etched brass. Assembly is quite simple as it uses CA to put it all together. Simply remove the parts from the etched brass sheet, file the "spue" smooth and assemble as instructed. The hardest parts were when the parts were very small, but I managed. Here is a photo of the finished signal bridge.


.
.
.
.
.
.
.
.
.
.
.
.
BLMA includes extra signal heads in the kit and I am hoping to install LED's in one to make the signal functional. BLMA has now sells signal heads with LED's so if I get frustrated, I may buy ready made ones, but I would like to at least try one.

Thursday, August 19, 2010

White Hills Junction Extension

I had the club members over on the evening of July 13 and we worked on two projects. The first was to build an extension of the upper shelf where Lompoc will go so I will have a tail track for what amounts to a switchback up to the mine at White Hills. The second project was pulling a pair of wires for powering turnout motors on the second level.

First a few words about White Hills Junction. Originally, the line from Surf to Lompoc ended at town. For a while between 1898 and 1901, Lompoc was the southern (railroad east) end of the Coast Line. That meant the trains to San Francisco started in Lompoc. On December 31, 1900 the Coast Line was completed with the laying of track across the Cementerio Trestle just railroad east of Gaviota. Passenger service began on the completed line on March 31, 1901. In 1923, the Celite Company, which was then operating the diatomaceous mine up San Miguelito Canyon, asked Southern Pacific to run a branch up to the new mill. Southern Pacific declined, so Celite chartered it's own railroad - Pacific Southwest Railroad. The line was graded and and track was being laid when Southern Pacific changed its mind and funded the remaining construction. Southern Pacific took over complete ownership and operation in 1928 and operated it until September 11, 1996 when Union Pacific took over operation. It is this line which departs from the main line at White Hills Junction. Here is a USGS map of the junction.


Here are SPINS maps of Lompoc, White Hills Jct, and White Hills.


I did not have room to duplicate the junction in the proper orientation, so I flipped it and the line to the mine comes off in the opposite direction than actual. I still needed to have enough track to run a train past the switch at the junction so it can be reversed up to the mine. Here is a photo of the local on the actual tail track about to shove up to the mine.


Current operation includes pushing an old DRGW caboose, painted in a Southern Pacific Railroad Police scheme, as a shoving platform.


Here is the local shoving up against the caboose.


The local shoves up the White Hills Branch toward the mine. The Lompoc Branch main is on the right.


The tail track will be laid on a shelf 11" wide and 95" long. The shelf is plywood and homasote with a 1 x 2 down the center of the bottom for strength. The extension is attached to the shelf using slots cut into a plywood plate attached to the extension which fit around two bolts put through the shelf and tightened with a washer and nut. The legs are 2 x 2's. Feet and a cross brace augment the legs. Here are two photos of the bottom of the shelf.

.
.
.
.
.
.
.
.
.
.
.
.
.


.
.
.
.
.
.
.
.
.
.
Legs are attached using folding leg brackets from Rockler - item #39505.


.
Here are some photos of the crew working on the extension.
John tightening the nuts on the extension connection.


.
John drilling a hole in the bottom of the second leg for the adjustable feet. Joe holding the leg steady. Jim holding the extension up.
.


Joe checking level.

Sunday, August 15, 2010

What Have I Gotten Myself Into?

Back on April 28 I made a promise to report every two weeks or whenever something substantial is completed. I now consider that a promise broken. It has been more than three months since the last post and I have not reported any progress. I apologize for the delay in posting.
.
Fortunately, some progress has been made. I have added an additional shelf for the tail track of the switchback at White Hills Junction. This is removable and obviously will not be used in inclement weather so rain closes the White Hills Branch.


.
I have temporarily laid out tie strips for the tracks in Lompoc and White Hills to see how they fit and to try to optimize the track arrangement.


.

I have made some changes in the shelf at White Hills to reflect the differences in elevation from the yard at White Hills to the mill and warehouse. An additional 3/4 of an inch was added to the upper portion of White Hills.


.

Unfortunately, I have been distracted with several other activities, some of which I will list here as an excuse.

I have a hard time saying "No". I am active with my family, my church, and with railroad activities other than my layout. I include in these my involvement with the South Coast Railroad Museum (http://www.goletadepot.com/), our local model railroad club - the South Coast Society of Model Engineers, the Southern Pacific Historical and Technical Society (http://www.sphts.org/), and several friends' layouts where I love to operate and learn from them in the hopes of helping my own layout to progress. As a result I do not progress very quickly on my layout.

Recently, I was the event chair for the Goleta Railroad Days (http://www.goletarailroaddays.org/). The event is now over and here are some photos from Jamie Foster from one of the two days - http://www.smvrr.com/100725.html

I then was asked to help a friend with his booth at the Ventura County Fair. I put in 5 days at the fair and managed to build several structures for the layout so that was helpful. I will report on each structure in the weeks ahead.

Lastly, I gave some thought to just how big this "oval of track in the laundry room" has become. I was interested in looking at this from an operational standpoint so I used Joe Fugate's formulas for evaluating a layout which Joe has posted on his website at http://siskiyou-railfan.net/e107_plugins/content/content.php?content.32

Here are some of the statistics:

All track - 743 feet
Mainline - 400 feet
Passing track - 73.5 feet (6 sidings)
Storage track - 100 feet (industries, team tracks, etc.
Staging track - 188 feet (17 tracks)

According to Joe's formulas, I should be able to accomodate a maximum number of cars of over 500. I should be able to have 22 trains run on the layout without overloading the trackage. This is considerably more than I was planning for. The Coast Route that I am trying to model has not had much traffic in the later part of its life so I anticipate a quite, layed back kind of operation. Still when I step back and consider the layout as it is coming together it is much larger than I thought and I sure hope I can bring it to a modicum of completion and provide a good space to operate and have some fun.

I know this has been more text than photos and I will endeavor to provide more photos of progress in the coming weeks. Stay tuned.