Wednesday, December 26, 2012

Red Rosin Paper

I had heard about using red rosin paper to rough in the scenery.  My understanding was that Howard Zane was the first to use it, at least he had it published first in the Railroad Model Craftsman in January 2007.   I have a space between the track and the fascia and between the track and the backdrop/wall and thought this might be a way to fill the gap, at least temporarily.  I also saw it being used on John Parker's BNSF Fall River Division - http://home.comcast.net/~jkparker/journal.html  Scroll down to the July 2008 Update.  If you ever get a chance to see or operate on John's railroad, do so.  It is an amazing layout and fun to operate on.

Red Rosin Paper is readily available at hardware and big box building supply stores.  It is inexpensive at about $14 for a roll 3 feet wide and 140 feet long.  The paper is painted with white glue and when it sets is stiff and will take plaster or ground cover.  The hardest part of the process is supporting the paper while it is painted.  I tried doing that using masking tape.  It does not work well as the moisture in the glue counteracts the adheasive on the tape and the paper falls.  I ended up using wadded newspapers and more tape to hold in in place, but I am getting ahead of myself.

I decided this would be a great project for the local club to help me with.  I did a couple small sections to show them what we were doing and then let them at the paper and tape.  All we did was put the paper in place and I would paint the glue on later.  Here are some photos of the fun.

Bob applying tape

Art adding tape to a tight spot


David taping


John taping

Gary triming paper to fit


The entire crew - l to r Art, Bruce, David, John, Joe and Gary


Tape and paper at the end of double track


Paper in place west of Carpinteria
 The next day I slathered on the glue, full strength, using a cheap disposable paint brush.  I had purchased a full gallon of the white glue pouring it out into another container for ease of application.  I also later applied some plaster to the area just west of Carpinteria.

This is the same area as the above photo but now the red rosin paper has had glue applied
and an additional layer of plaster has been applied over the stiff red rosin paper.


Finished red rosin paper at double track. 
This is the same area John was taping and photographed with both tape and some paper in place.

Finished red rosin at Goleta with Coast Starlight


Carpinteria Creek Bridge, Part 1

One of the signature features, for me anyway, in Carpinteria is the 100 foot deck girder bridge across Carpinteria Creek.  It is actually two 50 foot spans with a pier in the middle.  The creek is just east of town and is easily visible from Carpinteria State Beach Park.  Here is a photo of the bridge.

When I first put roadbed on my layout, I knew I wanted the bridge to be the first structure as you approach Carpinteria from the east staging.  I had put a section of laminated roadbed in the place where the bridge was to go.  Now it was time to put the bridge in. 

The bridge is pretty standard, so the MicroEngineering 50 foot deck girder kit was perfect. 

I made two of them to span the creek.  I debated a lot about what to do for the pier.  None of the commercially available piers that I looked at were quite right so I made one out of wood, painted it to look like concrete and put it in place.  I will weather it later. 


The track curves just a little as it comes into town on the layout so I have a slight curve on the bridge spans. 

I have done some initial preparation for the creek and will add water and foliage soon. 


Check back for part 2, hopefully within a couple months.


Tuesday, December 25, 2012

Fall Conventions

September and October brought two conventions to nearby Ventura County.  The Pacific Southwest Region of the NMRA held theirs in Oxnard complete with clinics, layout tours and model contests.  I went to a couple days of clinics and one afternoon got around to three layouts.  My layout was also on their tours on Friday and Sunday.  On Saturday I assisted Gary Siegel as he had both his outdoor G-gauge layout and his indoor HO scale layout open.  We were busy most of the day with lots of visitors.

At my layout, I had about 8 people on Friday and about 40 people on Sunday.  I had tried to get a few things done on the layout in anticipation of the tour but was unable to complete my list.  I did start the installation of the Carpinteria Creek bridge, installed some red rosin paper to the holes next to the roadbed on the first level, made some track changes in Lompoc, worked a bit more on my track and built a few more structures for the Santa Barbara industrial area.  I will cover all that in some upcoming blog posts.

In October, the Southern Pacific Historical and Technical Society had their convention in Ventura.  I was one of the co-chairs so was quite busy.  We had close to 250 attendees - some from as far away as Belgium and New Zealand.  We had a full program of clinics/presentations, tours of lemon packing sheds, official cars, the Port of Hueneme, and a train ride on the Fillmore and Western over some trackage not normally used for passengers.  There was a full vendor room that overflowed onto the adjacent mezzanine and a wonderful collection of models that members had brought to display.  The banquet was well attended and all enjoyed listening to

I roomed with Mike O'Brien, the official convention photographer.  We did some downloading of photos onto my computer so I will share some of the fun with you here through Mike's photos and also some of my own [SP official car 192, Santa Barbara and the Fillmore & Western Trip].  Enjoy.

SP 142 Santa Barbara


SP 142 Santa Barbara


SP 142 Santa Barbara passageway


SP142 Santa Barbara Parlor paneling


Santa Paula Depot stop


Photographers at Santa Paula - The photographers chased the train all the way to Piru


Running through the citrus groves

John Signor, Pat Bray and F&W Conductor Larry


Scott Inman presentation on Daylight Train.  Mike O'Brien photo.


Vendor Room   Mike O'Brien photo.


Society Sales Table   Mike O'Brien photo.


Wall of Trains [Mine is the reefer block fourth from bottom.] Mike O'Brien photo.


Monday, December 24, 2012

Spain and Portland

During the spring and summer I spent more time away from the layout then working on it.  As a result there is little changed on the Santa Barbara Subdivision.  In mid-May we took a trip to Spain.  We traveled across northern Spain from Barcelona to the Atlantic Coast in Galicia near the border with Portugal.  We returned along the north coast and the Pyrenees.  Traveling 3500 miles by rental car, we camped, hiked, and explored archaeological sites, beaches, mountains, cathedrals, monasteries, and cities enjoying the spring wildflowers and people. 

While we were there we visited two railroad museums.  The first was the Basque Railway Museum (Museo Vasco del Ferrocarril) in Azpetia in Basque Country. 

A small museum but a wonderful collection and a great staff.  They are located at the old shops of the Urola Railway which became part of  Euskotren - the Basque Railway system in 1986.  They have utilized the shops to store a collection that includes some of the oldest operating steam engines in Spain as well as the oldest electric and the oldest passenger car. 


1887 Stephenson

1925 Electric locomotive


1876 Passenger Car

They also have a turntable and the accompanying garden tracks. 

The old Azpetia station building houses a collection of railway employee uniforms over the years and a fantastic railroad timepiece collection from pocket watches to depot clocks. 


We spent the better part of an hour talking with one of the staff as we toured the collection.  Well worth a side trip if you are in Basque Country.

The Catalonia Railway Museum  (Museu del Ferrocarril de Catalunya) is 40 km south of Barcelona near the current station at  Vilanova i la GeltrĂș in the former RENFE (Spanish Railways) shops.  An incredible collection of steam locomotives is arrayed around the turntable in the roundhouse and adjacent garden tracks. 


They also have some more modern equipment including an early Talgo trainset. 


Just a few weeks after returning home we headed north to Portland for our son's wedding.  We managed to squeeze in a visit to Bill Decker and his under construction Southern Pacific Cascade Line http://espeecascades.blogspot.com/  Bill's blog is documenting his progress on this large layout.  Bill hopes to have it open for the NMRA national convention in Portland in 2015.

My son's best man was Sean VanderJagt who my son Michael met at an operating session at Gary Siegel's L&N Eastern Kentucky Division about 12 years ago.  They reconnected when my son moved to Portland.  Sean had the batchelor party dinner on board a sternwheeler on the Columbia River.  We managed to see several trains during our cruise.  Sorry no photos.  The wedding went well and we have now expanded our family.

Thursday, April 19, 2012

Old Photos of a Young Railroader

Well it has been four months since I posted on the blog and to be honest not much progress has been made on the layout.  I have been working on installing the remaining Tortoise machines on the first level, working on a few structures and doing too many non-layout activities.

During this time I rediscovered some old photographs my father took.  My dad really enjoyed photography and would take both color slides and black and white print film.  He developed the print film himself and printed the film using enlargers in a small darkroom in the garage.  The photographs here were taken using Kodachrome 25 and the colors are still great. 

As a family we would often travel from the family home near Santa Monica to downtown Los Angeles and visit some of the sites like Olvera Street across from Union Station and Chinatown just north of there.  When we visited Chinatown we would often visit the Southern Pacific Yard just southeast of Broadway.  The yard was known as both the Bull Ring (east end) and Corn Field (west end).  At the time we visited there was a wooden pedestrian bridge across the yard from North Broadway to North Spring Street.  Here is a shot of my sister and I on the bridge.
I think the date is about 1953.  Notice what looks like a New York Central Pacemaker boxcar behind us.  If you look closely you will see that it is a standard boxcar-red painted car with a weathered black tank car on the track just toward the camera from it.  You can just make out the dome on the tank car if you click on the photo and make it larger.  My dad took some shots from the bridge while we were there.  Here is a shot of Southern Pacific switcher 2533 working in the yard.


Now I know it is taking me a long time to get my layout up and running but just so you know I have really been working on it a long time here is a photo of my sister helping me with some new track and trains.  I think the date is sometime in 1952.


So much for old photos.  I will try to get a bit more work done on the current layout and post some progress photos soon.

Tuesday, December 13, 2011

Almost Operations

I keep getting closer to having operations on the Santa Barbara Subdivision but am still not there. The SP Santa Barbara Sub has come a long way since that abreviated op session on January 23, 2007. You can see a photo and read about that night in an early blog post here.


Some of the same friends from the South Coast Society of Model Engineers, the local Santa Barbara model railroad club I belong to, were over again on December 6, 2011. I still have some track tune-up to do so we struggled running trains. Michael Lopez, one of the club's junior members made an attempt and finally got a short passenger train running on the second level.


Here are some photos and a video.


Behind and between Paul G and Michael L is the location of that first impromptu operating session mentioned above


Here is the rest of the crew assembled at the curve of Santa Barbara Yard


Here is a short video of the second level passenger run


Monday, December 12, 2011

Second Level Fascia

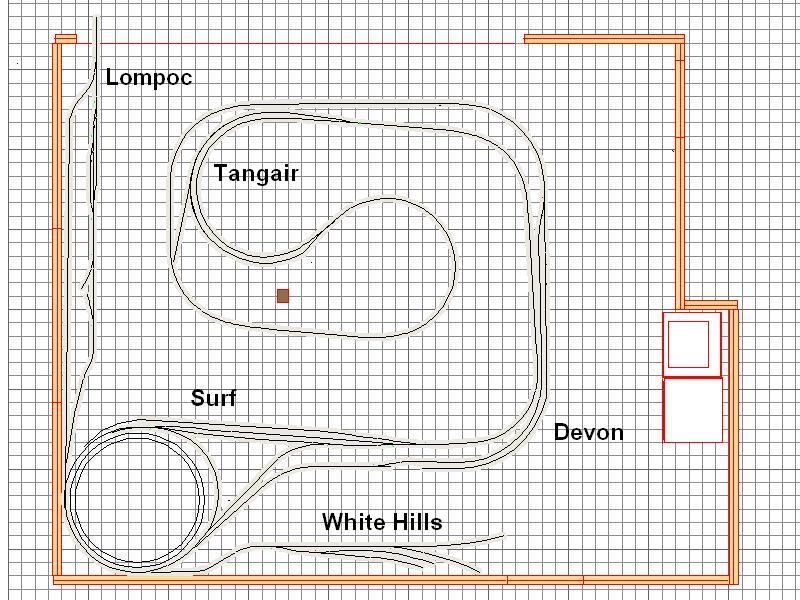
While some of the second level fascia was installed almost a year ago, there was still some to install and all of it had to be painted. I had delayed putting the fascia along the track at Surf as there were 7 turnouts and slow-motion switch motors that needed to be installed. Once the fascia is installed it becomes more difficult to work in the areas.


Area at West Surf before fascia was installed


The Surf wye and the helix before the fascia was installed


The east portion of Surf on the outside of the helix before the fascia was installed. Note the fascia installed on the Lompoc shelf on the right side of the photo

I also decided to install fascia on the Lompoc shelf and the White Hills shelf. Both of these shelves are constructed of plywood and homasote. The second level fascia is narrow in most areas to maximize the views of the lower level and the open space between the two levels.

Wherever a switch for a slow-motion switch motor was to be mounted on the fascia, I cut a 1 1/2 inch hole so I could fit a PVC tubing end cap into the hole. The switch is mounted inside the end cap and does not stick out into the aisle. I first saw this technique on Rick Fortin's ATSF Valley Division Fourth District layout.


A close up of the PVC end cap with a DPDT switch installed


DPDT switch pre-wired before installation


Installed end cap and DPDT switch

I did not install the endcaps until I had painted the fascia.

When I finally had all the fascia in I painted it with the same color I used on the lower level. I had used a computer color matcher to select a color that roughly approximates the Southern Pacific Dark Grey used in the two-tone passenger scheme and the post-1958 scarlet and grey locomotive scheme.


Surf area after fascia was installed and painted. Note end caps installed


Painted second level fascia above Santa Barbara


Painted second level fascia at White Hills and Devon